If you're exploring mobility aids or already have a rollator with brake issues, you've come to the right place. Let's dive into everything you need to know about 4-wheel rollator walkers and how to troubleshoot those pesky brake problems.
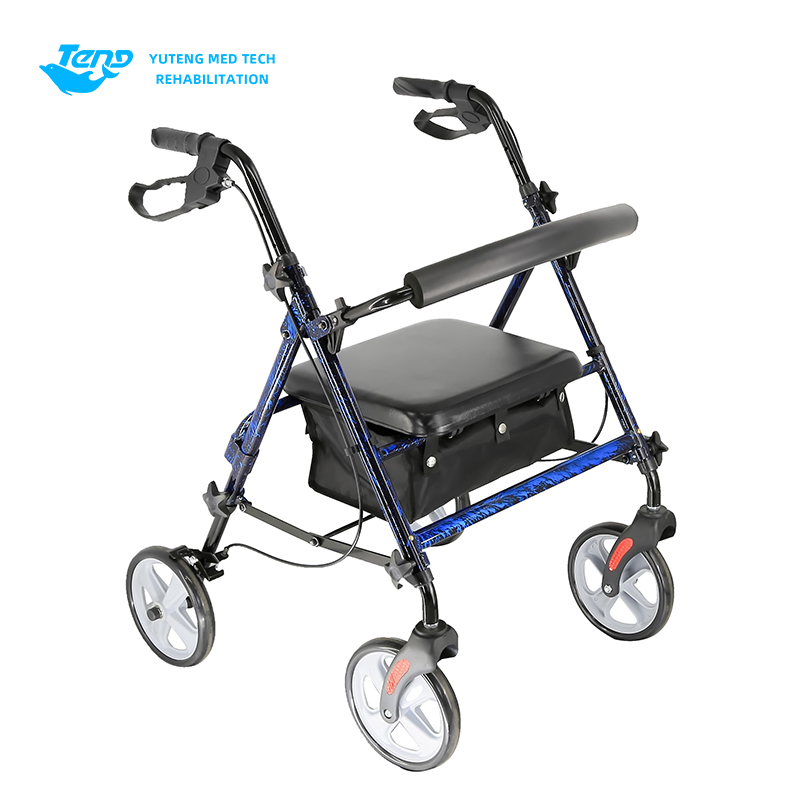
A 4-wheel rollator walker is a mobility device designed to provide stability and support while walking. Unlike traditional walkers that need to be lifted with each step, rollators roll smoothly alongside you, making movement easier and more natural.
The key features that set 4-wheel rollators apart include:
1. Four-Wheel Design
The defining characteristic is, of course, the four wheels that provide excellent stability and smooth movement. These wheels allow you to push the rollator rather than lift it, conserving energy and making walking less strenuous.
2. Hand Brakes
Every proper 4-wheel rollator comes with hand brakes similar to those on bicycles. These brakes are essential for safety, allowing you to control your speed and stop when needed. They typically feature a squeeze-to-brake system and can be locked for stationary use.
3. Built-in Seat
One of the most appreciated features of 4-wheel rollators is the built-in seat. Feeling tired? Simply lock the brakes, turn around, and take a rest whenever needed. This feature is particularly valuable for those who tire easily or need to rest during longer outings.
4. Storage Options
Most 4-wheel rollators include storage solutions like baskets, pouches, or bags under the seat. These allow you to carry personal items, shopping, or medical necessities hands-free.
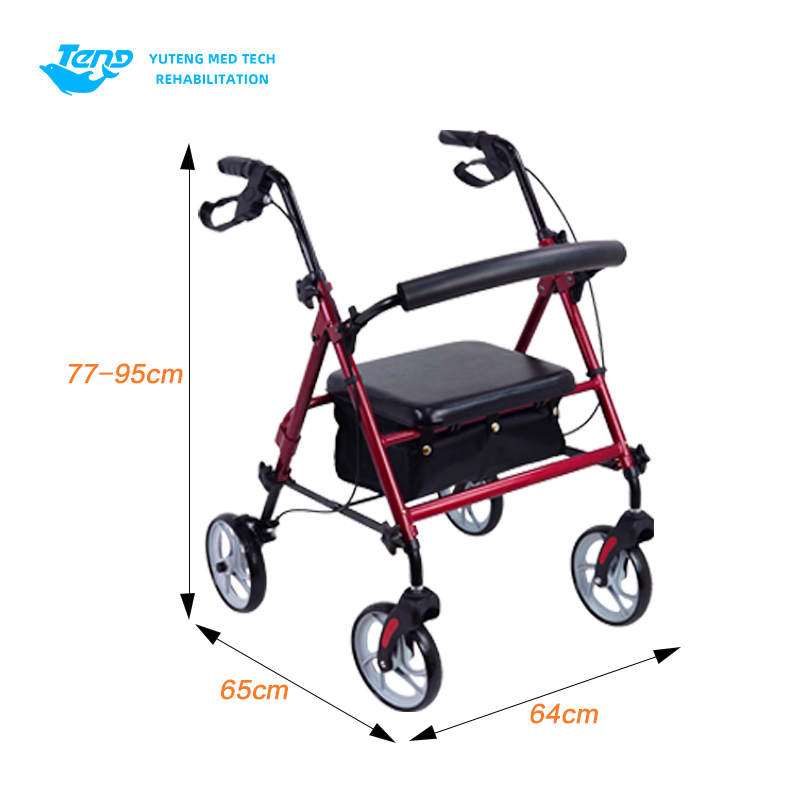
5. Adjustable Height
Quality rollators feature adjustable handlebars to accommodate users of different heights. This customisation ensures proper posture and comfort during use.
4-wheel rollator walkers are ideal for individuals who:
Need some walking support but have reasonable balanceWant to maintain an active lifestyle despite mobility challengesRequire occasional rest breaks during longer walksNeed to carry items while movingPrefer a mobility aid that's easier to manoeuvre than a standard walker
Common Brake Issues with Rollator Walkers
The braking system is crucial for your safety when using a rollator. When it's not working properly, it can cause serious concerns. Here are common brake problems you might encounter:
1. Loose Brakes
If your brakes feel loose or aren't engaging properly, they may need adjustment. This is the most common issue and, fortunately, also the easiest to fix.
2. Sticking Brakes
When brakes remain engaged even when you're not squeezing the handles, or they feel stiff and difficult to engage, this indicates a sticking brake problem.
3. Uneven Braking
If one wheel locks while the other spins freely, your brake tension is likely uneven, which can cause your rollator to pull to one side.
4. Worn Brake Pads
Like bicycle brakes, rollator brake pads wear down over time. If your brakes no longer grip effectively even after adjustment, the pads might need replacement.
How to Fix Rollator Brakes: Step-by-Step Guide
Don't rush to replace your entire rollator due to brake issues. Most problems can be solved with simple adjustments or minor repairs. Let's walk through how to fix common brake problems:
Adjusting Loose Brakes
Locate the adjustment mechanism: Find the barrel adjuster on the brake cable near the wheel or handle.
Tighten the cable: Turn the barrel adjuster anti-clockwise to tighten the brake cable. Make small adjustments, testing after each turn.
Check brake function: The brake should engage when the handle is squeezed halfway. If it requires a full squeeze, it needs more tightening.
Balance both sides: Ensure both brakes engage equally to prevent the rollator from pulling to one side.
Fixing Sticking Brakes
Inspect for obstructions: Check the brake pads and wheel area for debris or damage.
Lubricate moving parts: Apply a small amount of silicone-based lubricant to the brake pivot points (avoid getting lubricant on the brake pads or wheels).
Loosen overtightened cables: If the brakes won't release, turn the barrel adjuster clockwise to provide more slack in the cable.
Check for bent components: Examine the brake arms for any bending or misalignment that might cause sticking.
Replacing Worn Brake Pads
Gather tools: You'll need a screwdriver, possibly a small wrench, and replacement brake pads specific to your rollator model.
Remove the old pads: Typically, a screw or clip holds the brake pad in place. Remove this fastener and detach the old pad.
Install new pads: Attach the new brake pads in the same position as the old ones.
Adjust tension: After replacing pads, you'll likely need to readjust the brake cables as described above.
When to Seek Professional Help
While many brake issues can be fixed at home, some situations warrant professional assistance:
If cables are frayed or damagedIf brake handles are brokenIf you've made adjustments but brakes still don't work properlyIf you're uncomfortable making repairs yourself
Local mobility shops or medical equipment suppliers often offer repair services at reasonable rates.
Maintaining Your Rollator Brakes
Prevention is always better than cure. Here's how to keep your brakes in top condition:
Regular inspection: Check your brakes weekly for proper function and signs of wear.
Keep them clean: Wipe down the wheels and brake components to prevent dirt build-up.
Test before use: Always test your brakes before setting out on a journey.
Avoid brake strain: Don't use the locked brakes as a substitute for wheel locks when transporting your rollator in a vehicle.
Storage matters: Store your rollator in a dry place to prevent rust on brake components.
By properly maintaining your 4-wheel rollator walker and addressing brake issues promptly, you'll ensure a safer, more reliable mobility experience. Remember that a well-functioning rollator isn't just about convenience—it's about maintaining your independence and quality of life.
Have you had experience fixing rollator brakes? What techniques worked best for you? Sharing your experiences might help others facing similar challenges with their mobility aids!
TradeManager
Skype
VKontakte